Showing posts with label Real-life examples. Show all posts

Wednesday, December 21

Graduation Party

Some of you may know that I enjoy party planning.
Really, I do.


The fondant cake was my masterpiece. I was quite excited about it. The underlying emotion really was my excitement for my husband's graduation, but man was I excited about that cake. We had a blast and I think Ian feels that we celebrated his accomplishment properly. Love that man!

Cake: White Cake Mix (from the box - thank heavens for those!)
Oreo Cream Cheese Cake Filling: Cupcake Project (but I used big chunks of Oreos instead of blending them)
Free Graduation Printables: Living Locurto
Pin It!

Friday, November 11

Dream Job, Dream Home

I was actually able to assist in designing my dream home.
Sure, it was 2 years ago, but I decided I should finally post pictures.
When I was in California, I designed certain portions of this home with my favorite design firm, Meridian Interiors. The principal of Meridian and I chose lighting fixtures, tile and stone, plumbing fixtures, paint, and designed cabinetry and other architectural fixtures.

Love. Love. Love.
For your viewing pleasure:


What are your favorite elements?

Pin It!

Thursday, October 27

Guest Post: Jennie Moss from Haute and Handpieced!

Hello beautiful readers.
I am Jennie Moss and I am guest posting on
my lovelies here at
Paisley Interiors.

Well I thought since Fall is here
we all need a little spice in our wardrobe
so I found an item in my closet
that needed some major love & attention...

this is a SIMPLE tutorial on SWEATER sprucing!
what you need to start:


then simply cut two inch & a half strips of wool

and start to pleat your strips & pin them...


I hand sewed it all, because my machine is hating me.
 But it was pretty easy and fast, even by 
hand sewing all of the pleat. 
As you pleat the fabric and sew it to your sweater, you can
shape it around the neckline into
either a v or a half circle.

This is how my sweater turned out....


I hope you have a fun time repurposing
your sweaters & shirts!

Oh and this shirt got a little exciting with a zipper.

I cut the back up the middle
and sewed the zipper to one side, than the
other. My shirt was a little big so I gathered the back.


and this is how this ended up.
CUTE!


Have a great fall
happy crafting.

Love,


Pin It!

Wednesday, October 26

Guest Post: Brittany from Play With Your Family!

Hello! I'm Brittany from Play With Your Family and I am so excited to be a guest on The Paisley Suit! I went to high school with the lovely ladies of this blog and love them both SO much! I am so excited to be blog swapping with them today, and hearing some of their amazing expertise, as well as giving some of mine. Here is a little intro to us and our site: Sarah and I both went to Brigham Young University and graduated in Recreational Therapy! We now have so much fun staying at home with our kids and have found, in our site, a great way to share our knowledge and promote our passion: The Family! The goal of our site is to help you strengthen your family through recreation. Each Monday we issue a Family Challenge that helps us set a goal that will aid us in strengthening our families that week. Throughout the week we post ideas, articles, books reviews, stories, or other material focusing on families. Every Friday we teach you a new game and in our "So What?" section, we share how that game can be used constructively do anything from improving communication to just bringing more laughter into your home. Come check us out!
playwithyourfamily.com 
I wanted to share a little bit about how to utilize your home to bring your family together. I'll first tell you about some of my dreams! :) And then we'll talk about some practical things. I have a dream that I have a huge house, and I designed it, so it looks just like I want. I have a GREAT ROOM! (This is a must for me in my future house.) I think great rooms are amazing and I love how all of the central family hangouts are in the same place. I love being in the kitchen, so I love the idea of being able to cook while my hubby and kiddos are doing other things like homework, watching sports, or of course playing (although I might have to stop cooking to play).  I also like the idea of pushing everything out of the way and having a huge room to play in. Dancing around on the floor, building a fort, my husband would like me to add wrestle mania...tons of fun things to do in such a big space. Here are some great, great rooms! :)
michaelemilio.com
hgtv.com
Recently exploring lots of fun play things for my little boy's birthday, I also fell in love with this set up for my future house:
gardenphotos.com
Now, of course we can't all have the house of our dreams, at least right this second, so here are some ways to utilize your home to bring your family together that are a little more practical. 
  1. Don't be afraid to move things around! The best part about furniture is it can be moved around. But I am not talking about just moving it to get a different look, I am talking about utilizing your furniture as pieces in your game. Move them out of the way to create a bigger floor, drape a blanket over one to build a fort, make a couch the "safe" zone in a game of tag. Furniture is meant to be used in so many different ways. 
  2. Be creative in what you put in each room. In the house we are living in now, our bedrooms are downstairs and the kitchen and family room are upstairs. We decided that instead of having all the toys downstairs and having to always go downstairs to play, we would keep some upstairs. This way our little guy can play right where we are and doesn't have to go down by himself. If you want your family together more, keep some toys out for them right in the middle of the action, don't keep them stuffed in a room every time they want to play. We can be sure that you'll be the one that misses out on all the fun! 
  3. Original artwork. I love going into my sister in law's house and seeing the art she has on her walls. Each piece is an original work of art and is totally free. It's made by her kids! She frames their most recent art work and posts it on the walls for all to see. I can tell how excited her kids get when we point out something that they've done that's on the wall. They feel special and they know their parents are proud of what they've done. 
  4. Post reminders of the things you value. I walked into a home once that had a huge wall full of small black framed photos. In each photo was a picture of their family doing something fun. Everyone was laughing and smiling in every single picture and I knew right away that this family valued each other and doing things together. 
  5. I think one of the most important things to remember is that sometimes you have to let your home go in order to be with your family. Wouldn't it be grand if we all had a perfectly clean house with everything in it's place all of the time? Well, that's just not life. Sometimes we have to leave the dishes to catch that last day before the rain. Your home is important but the people inside it are what really matters. Home is where your family is. So if they are at the park while you're reading this post....What are you waiting for? Go play!

Pin It!

Thursday, October 20

Pinspiration Update

Do you ever multitask?
I do.
It's what women do.
Right?

Why complete one task when you can complete five tasks?
That's my motto.
This past week has been full of multitasking.
As I write this post, I am taking pictures of my pinterest projects,
doing laundry, teaching my friend how to digital scrapbook (over the phone), and I might be watching "You've Got Mail".

So next time I'll take pictures of my pinterest process and make a tutorial.
I promise.

Here is an update on last week's post in which we had a glimpse at this:

Here are the the pictures to really give you a good view of how 
my Pinspiration project turned out:


My tip, if you decide to make these on your own, is to get a group of girls together to make these with you. It's a lot less expensive that way. I went to Michaels and JoAnn's each week with my 40% off coupon and stocked up on styrofoam balls. I went to the Dollar Tree for my tacks (300 for $1.00) and I got my spray paint at Kmart (it was on sale at the time). I found for the fabric balls that the smaller you cut the strip of fabric, the better.

And I got the vase for $1.00 at DI.

Mission accomplished.

How would you use these balls to decorate in your home?

Pin It!

Thursday, October 13

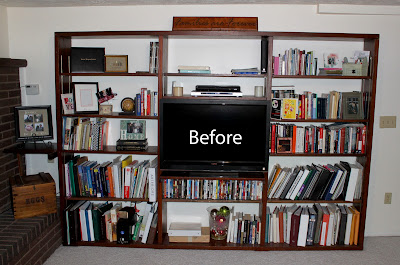
Bookcase Makeover

This week's Pinspiration Project was inspired by the following pin.


This bookcase has been a challenge for me. It has stared me down and intimidated me. And I finally decided I was going to tackle the project and make a pin come true. 

DI Find #1 used to be a candle holder and I put cork board covered in fabric where the candles used to go; I haven't decided what to pin to the cork board yet. DI Find #2 is a frame that I spray-painted and put some fabric behind (similar to the frame on the second shelf down on the left). DI Find #3 is this cute little basket that I used as a book-stand.

And now for the Pinspiration Project! I took styrofoam balls and covered them with fabric and thumbtacks. Total cost was about $3.00 and the DI Finds totaled about $5.00

What do you think? Any progress for this bookshelf?

Pin It!

Wednesday, March 23

Real-life #5

She deserves her own post.
I'm talking about none other than my best friend, Risa.

Look at these pictures and tell me she's not cool.
You just can't!
Risa is a master crafter, and I look up to her!


Checklist:
- Painted empty frame
- Painted block letters
- Fabric mod-podged to blocks
- Slight grunge look created by painting the edges of the fabric
- Sense of accomplishment

Risa, I am so impressed!

My peeps, will you continue to share your projects with me?
I feel inspired!
Pin It!

Monday, March 21

Real-life #4

I just happen to have the most adorable family.
One of my favs is my cousin Sara...
We definitely know how to laugh together, play together, and work together.
You could say we get along. :)

When we were little, we used to walk from Grandma's house to the gas station on the corner. Our parents would give us a few bucks for a treat, and it created a tiny sense of independence. We thought we were 
hott stuff, I tell ya. And we were.

Now we are still hott stuff, but we just don't get to see each other as much.
And that's the sad part of the story.

Now for the good part!
Sara has an adorable little boy (fits right into the family) and his name is Ryder!
She came up with this fabulous idea to decorate his nursery with FABRIC!
So cute, right?

Currently, the letters and decor are taped on because she's waiting for my opinion.
Okay, honestly, I think it's a fabulous idea! I love the letters and the design.
I just have a couple suggestions.

My suggestions/comments:
1. the last "R" seems a little out of place; I like how the first "R" is placed on the square background. Can you tweak the last "R" to mimic the first "R" or make the black a little smaller and sideways? Hopefully that makes sense. :)

2. you can create a little dimension by mounting all of the pieces of fabric on foamboard or wood. you might even want to create dimension by sewing them with batting... The foamboard would be the easiest solution and all you would need to attach the fabric is Spray Adhesive.

Here are some concept photos:
P.S. Sara, I love all the other decor, too, and his bedding! SO CUTE!
Pin It!

Tuesday, March 8

Real-Life #3

To sum it up, right now I'm feeling like it would be nice to live in Chicago for a while. :)
I have thoroughly enjoyed looking at pictures of Kiley's place!
And it makes me feel like we are in an episode of "Friends" -
which I guess you could say, Kiley and I have already experienced such a feeling...
We did actually live above Mr. Heckles himself!

Let's chat about the Chicago abode:
Do you have any large clocks?
I picture a clock on one wall, and art on the other.
I like the idea of a hall chest here, using your art and the statue.
What about plants? Do you have any small plants to accessorize with?
Did you decide to move this next to the desk?
Also, what is to the right? I see some fab black and white fabric.
For this last entry wall, you could hang some of your personal photos.
What about getting a big letter "M" for your last name?
Or a long tall mirror?


I know this doesn't fit in any of the areas we've talked about,
but I totally picture a modern folding screen in this condominium.
Just a thought.


Here are some photos for you to peruse:
Lemon Tree Creations
Elle Decor

What about small mirrors hanging vertically instead of horizontally like shown below?
Pottery Barn
Pottery Barn

More to come...
until then, any other real life design situations you need help with?
Pin It!

LinkWithin

Related Posts Plugin for WordPress, Blogger...