Showing posts with label DIY. Show all posts

Wednesday, April 4

Progress!

I have only just begun...
And I'm trying to figure out how in the world people reupholster all on their own. I have watched my mom work miracles with fabric before (which resulted in both praise and laughter at times - like those ginormous zebra pajama pants that she made for me). But I must have missed a few sewing lessons because it takes me quite a while to make progress.

BUT! I finally started taking the cushions apart, which made me pretty committed. It's hard to give up when it is staring you down all day. So I completed my first cushion.
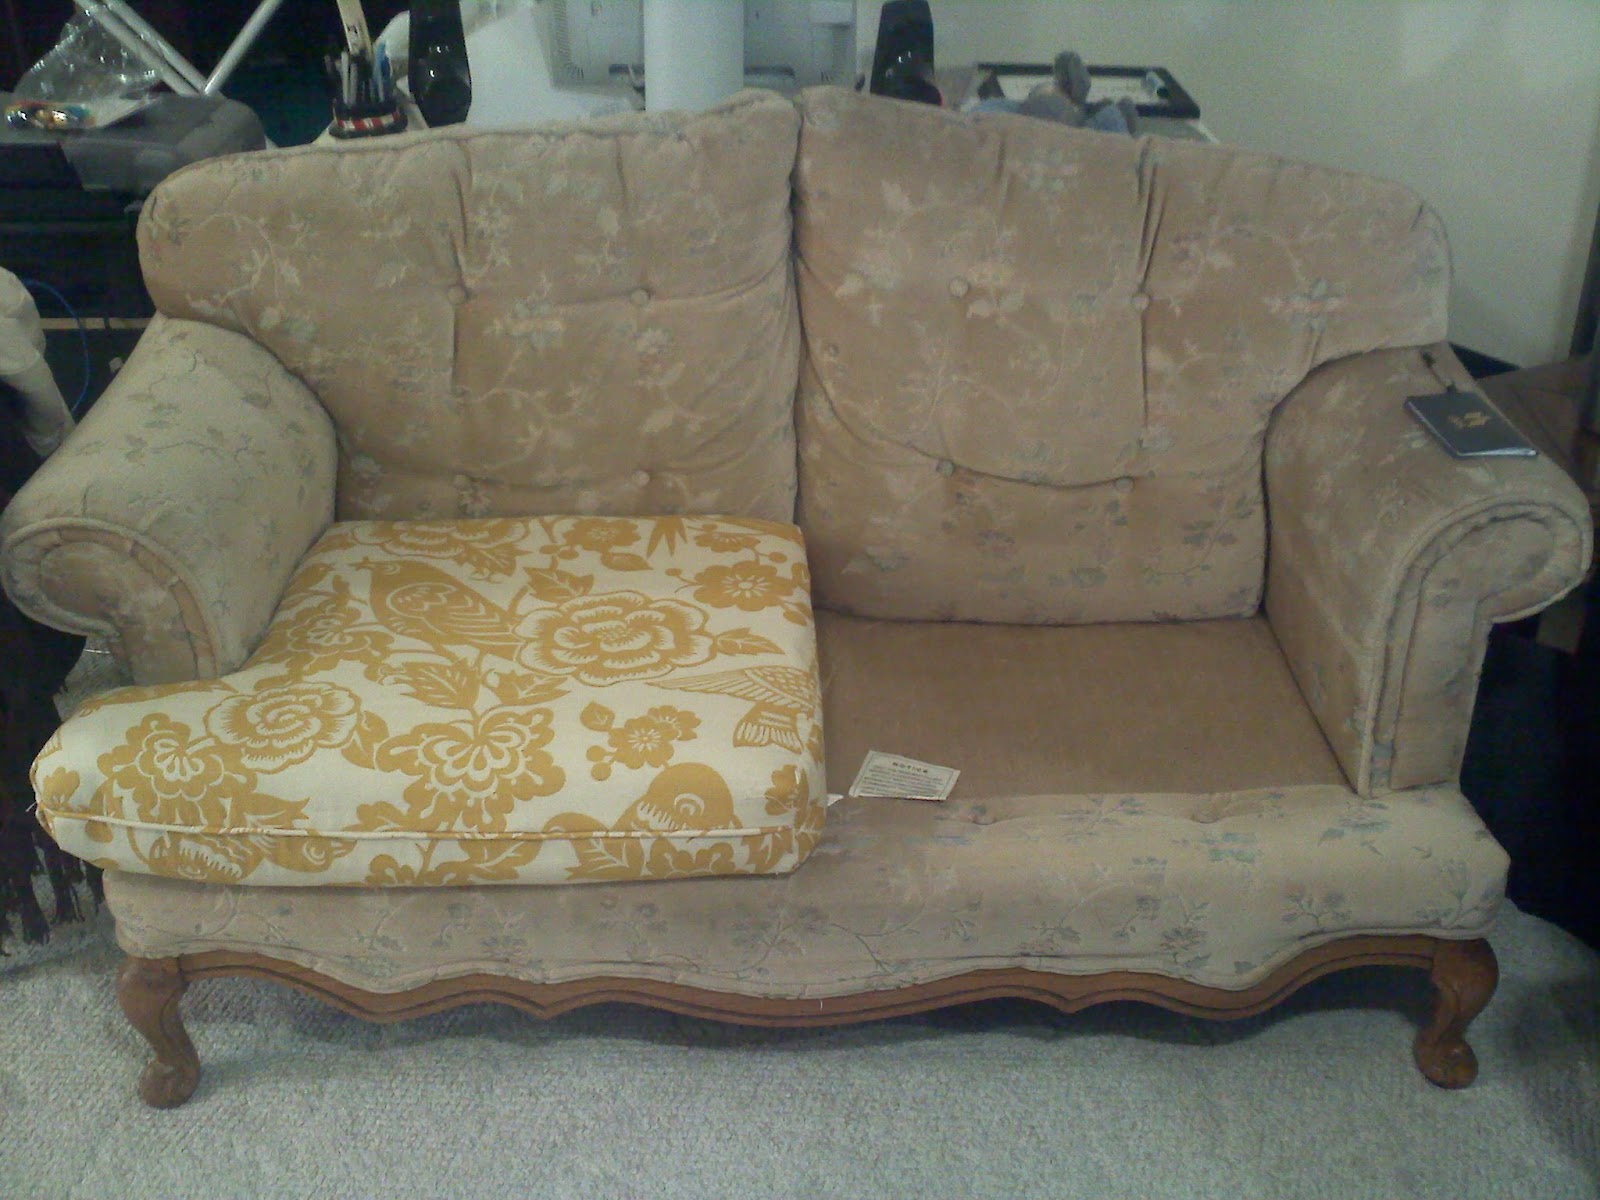
What do you think?
-Steph
Pin It!

Wednesday, January 18

Valentine's Crafts - Sarah from Crafting and Creativity

Today we are pleased to introduce Sarah! She has an amazing blog and she is super creative. We are so lucky to be able to work with her. Enjoy her post and make sure you check out her blog!


Hey everyone, I'm excited to be here at Paisley Interiors today!

I'm Sarah & I blog over at Crafting and Creativity.


I love making simple and pretty things.


I love creating things for my kids or for our home.
And I love to organize.

I love browsing Pinterest for inspiration.


I was inspired by this on Pinterest & wanted to make my own version. Here's what I did......


I wanted to fill this white frame that was now empty after the holidays...


I grabbed a piece of grey linen & then made a heart with some pink buttons.

I just set the buttons on & moved them around until it looked like a heart. Then I glued them in place with my trusty glue gun!


Instead of somehow making this permanent in the frame, I just wrapped the linen around the glass, then stuck it all back inside the frame.

After Valentine's Day, I can just store the piece of fabric with my decorations, then my frame will be ready to fill for Easter!


This literally took 5 minutes to make & I love the result!


The subway art was a printable that I framed last year from eighteen25.

The little rosette ball was made by gluing rosettes I made using crepe paper streamers onto a foam ball, then I stuck it on a candle holder.


And because yesterday was kinda gloomy out, it was hard taking decent photos. So my frame even made a trip outside for a quick photo....


I love having some pink stuff up in my home!!!!


Last year I put together some little bubbles to give to the kids in my class at church for Valentine's Day.
{see the original post here}


This year I need to come up with something new for them. I teach the same group of kids, but the class has doubled. So stay tuned for what I come up with, as well as some other Valentine's Day goodness at my blog in the coming weeks!


Hope to see you over at Crafting and Creativity soon!


Thanks to Stephanie & Risa for having me!!


Pin It!

Thursday, January 12

The Paisley's 2012 Challenge!

We have exciting news!
Our 2012 Challenge will begin NOW!

Details:
You ask a question, and we post with an answer.
Just email thepaisleysuit@gmail.com!
You're welcome to ask any question...
pertaining to interior design, Pinspiration projects, crafts, life, or the like.

Maybe you'll see a pin on Pinterest that catches your eye, but there's no tutorial.
ASK US!
We'll take care of that for you.


Maybe you have been struggling with a design conundrum.
ASK US!
We'll provide an answer.


Maybe you have a mom question.
ASK RISA!
She's a mom! And a great one!


Maybe you have a crochet question.
ASK STEPH!
She just might be addicted.

We are excited for this project!
Be you-nique and enjoy 2012!

Don't forget to send your questions to thepaisleysuit@gmail.com


Pin It!

Tuesday, January 10

DIY Pillows

Okay peeps, I need your advice.
Risa and I are taking on some living room projects...

You know those moments in life when you feel a little lost about what you're supposed to do?
I feel like I've been in that "moment" for a while now...
So I'm crafting until I receive some inspiration.
And my living room is the first to benefit from my crafting.

My fabric samples should arrive this week,
and I'm 99% sure I'm going to use this fabric for the sofa:
To see the other options, click here.

I need some opinions... what pillows do you like below?


So what pillows do you like?

P.S. I have some pinspiration projects that haven't been posted yet!
And I'm excited to share!
So stay tuned!

Also, I have decided this is my next DIY project:
Super cute place to write love notes every morning!
Pin It!

Tuesday, December 6

Graduation Decorating

My new Google seems to be Pinterest.
Well, when it comes to crafts anyway.
Why sort through loads of craft images on google
when Pinterest weeds out all the horrible designs for you?
You may have to see the same image about 23 times, but it's worth it in the end.

As most of you know, my cute husband is graduating from college next Friday.
Next Friday.
I can't even believe that is a reality.
It's soooo close! Wahoo!

And what does that really mean? Party time! I have been thinking about this graduation party for years, so now is the time to really go all out.
I love the cupcakes. I have been planning to make sugar cookies with our school's logo... but the cupcakes might make the dessert menu.


I am pulling some of those wall swirls out... and you'll need to stay tuned for that pinspiration project because I have found the key to making those! Staples and string! Thanks to a lovely friend, Claire.

I mostly like the sophistication of black... I'm thinking black, teal, and grey.

Don't worry. Pictures will be posted. For sure!

Have a fabulous day, all!
Pin It!

Thursday, November 10

Custom Bedskirts

We keep our bed on risers to utilize the space underneath. We're tall and like that our bed sits up higher. The problem with risers though is they're unattractive and it's harder to find a standard bed skirt that is the right length. So I decided to make my own. Here's how it went:

  • I used canvas drop cloths that you can find at Home Depot. I bought the $20 package... so there was a lot of fabric. I don't remember the actual measurements.
  • I measured from the floor to the top of the box spring and added roughly 8 inches and then measured the lengths of the sides and front of the mattress.
  • I then laid out my drop cloth (after washing and drying it) on the floor and used my sewing ruler and 4ft level to make sure I cut all my pieces out straight.
  • I cut 5 pieces total. 2 long sides. 1 front piece. 2 corner pieces (which will be just as tall as the others but not nearly as long.
  • Then I ironed and hemmed all four sides of my pieces.
  • Then I attached them to the box spring using safety pins. This was the best idea ever, and I saw it on somebody's blog after doing a few google searches... so I don't have a source for that. By attaching the pieces with safety pins I could make sure they hit the floor where I wanted them to and they lined up evenly.
  • I attached the corners first and then the front and sides. This created a faux pleat and made it so I had complete coverage around my bed, but no extra sewing.
  • Then I put my mattress back on top of my box spring and haven't worried about it since.
reason we needed a skirt - that's just unattractive
attaching the corner piece
front and side piece


Pin It!

LinkWithin

Related Posts Plugin for WordPress, Blogger...