


I'm going to start doing more tutorials...
and our first is
How to Add Buttons and Tabs to your Blog!
Here is an image of what our layout looks like in blogger. When you click on the "layout" tab in blogger, you can upload your new logo/header as an image or you can use the link from photobucket. Do you already have a photobucket account? If not, create one at http://photobucket.com/ because this site plays a key role in creating the tabs/buttons at the top of the blog.

For the buttons, you can play with the sizes. I made our buttons 100x20 pixels. Once you've created your buttons, upload them to photobucket and click "view album" as shown below:

When the album opens, put your cursor over the image and you'll see this pop up:

When you click on the text next to "direct link" it will automatically say "copied".
Now back in blogger, click "add a gadget" on your layout. In the pop-up window, you'll click "HTML/JavaScript" and then you enter this text:
<a href="http://"><img src="http://" /></a>
Then paste the direct link to your photobucket image in the second "http://" spot. Make sure your link is in between the quotation marks. In the first "http://" spot, you put the website that you want it to link to.
Then you just keep duplicating that code in the same gadget, changing the "http://" links.
So for example, the text in my HTML/JavaScript for our tabs at the top of our blog look like this:
<center><a href="http://thepaisleysuit.blogspot.com"><img src="http://i846.photobucket.com/albums/ab30/allyourstorys/Homegreynew.jpg" /></a>
<a href="http://www.thepaisleysuit.blogspot.com/p/about-steph.html"><img src="http://i846.photobucket.com/albums/ab30/allyourstorys/Aboutgrey.jpg" /></a>
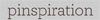
<a href="http://thepaisleysuit.blogspot.com/p/pinspiration-projects.html"><img src="http://i846.photobucket.com/albums/ab30/allyourstorys/pinspiration2.jpg" /></a>
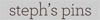
<a href="http://pinterest.com/thepaisleysuit/"><img src="http://i846.photobucket.com/albums/ab30/allyourstorys/stephdarktext.jpg" /></a>
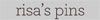
<a href="http://pinterest.com/risac/"><img src="http://i846.photobucket.com/albums/ab30/allyourstorys/risadarktext.jpg" /></a>
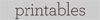
<a href="http://thepaisleysuit.blogspot.com/p/free-printables.html"><img src="http://i846.photobucket.com/albums/ab30/allyourstorys/printables.jpg" /></a></center>
And if you add <center> at the beginning of the code and </center> at the end of the code, then it will center the buttons on you blog and evenly space them. Once you click "save" then drag that new box to its new location below the header of your blog in the layout screen. That is shown in my very first image.
Please leave a comment below if this helped, if you you have any questions or if you need more details.
Stay tuned for How to Get Your Shop Started on Etsy!

I really like what I see of the website. I know, you could be a web designer too! And I really liked your tutorial about the buttons. I thought it was very easy to follow along. Keep it up!
ReplyDelete